Is your bathroom in need of a major makeover? It will be a rewarding experience if you plan to do it yourself. But, choosing the DIY path requires careful assessment and planning, so you can get your project done quickly without wasting valuable resources. Let this step-by-step guide show you how to renovate a bathroom that you and your family will love.
Bathroom Renovation Cost and Preparation
Did you know that renovating a bathroom is more expensive (AUD$17,522) than installing one in a new home (AUD$16,430)? The Housing Industry Association (HIA) noted this finding on its 2017/2018 Kitchens and Bathrooms Survey. Of course, renovation cost varies from house to house, but this survey result also emphasises the importance of having a renovation plan and following the right bathroom remodelling steps.
Bathroom areas to remodel
Your bathroom may be just one small room, but it does have several areas that you need to evaluate first before demolishing and making that trip to the hardware store. Here are the things you need to consider:
- Tile and flooring: Consider the colour scheme and design you want for your bathroom. Do a little research and use apps for inspiration. Choose colours that blend well, and add texture on painted walls for diversity.
- Shower, tub and sink: If you love taking baths and your bathroom is spacious enough, then include a new bathtub on your checklist. Having one in your bathroom adds value to your home if you plan to sell it in the future. However, if you are not into baths, it’s best to make the most of your space by turning it into a large shower area.
- Storage and cabinetry: The amount of storage cabinets you can install depends on your family’s needs and the size of your bathroom. A vanity with lots of drawers and a recessed medicine cabinet is perfect for large bathrooms. On the other hand, a vanity with open shelves lets you save space and do away with swinging cabinet doors. Also, choose cabinets that are moisture-resistant and easy to wipe clean.
- Lighting fixtures: New bathroom lighting can enhance the look and functionality of your space. Adding a window to your bathroom is also another option to allow natural light and ventilation.
- Electrical wiring and plumbing: DIYers should be cautious when tackling these areas. Renovating bathroom utilities require skill and is best handled by pros to avoid costly repairs.
Tools for bathroom remodelling
Make sure you have the right equipment before working on your DIY bathroom renovation:
- Safety and measurement: face mask, work gloves, goggles, sturdy boots, long pants and sleeves, tape measure and stud finder
- Demolition: chalk line, hammer, pry bar, chisel and Shop-Vac
- Installation: bucket, extension cord, spackle with spackle knife, caulking gun, silicone sealant, power drill, adjustable wrench, screwdriver, hacksaw and utility knife
Steps on How to Renovate a Bathroom
Once you have your plan, tools and new fixtures ready, it’s time to start remodelling your bathroom. Here’s a list of bathroom remodelling steps you can follow to make the job easier and more organised.
1. Clear and sort out your bathroom stuff.
Gutting a bathroom can make a lot of mess, especially if you are replacing most of your existing fixtures. So, consider renting dumpster services to help you clean up. Empty your cabinets and vanity, and carefully take down mirrors and shelves that you’re reusing. Throw out or donate anything that you don’t need, then place the things you’re saving in a separate room.
2. Shut off utilities for safety.
Check the circuit map of your breaker box for your bathroom switch to shut off the power. Turn off your water supply as well, depending on your plumbing set up. If for any reason you can’t access the right valves for your bathroom, turn off your main water supply. Then, turn on all bathroom faucets and flush the toilet to drain excess water from your pipes and avoid flooding.
3. Remove the sink, vanity and toilet.
Prepare your bucket, wrench and utility knife. Depending on the type of sink, vanity and toilet you have, take out these bathroom fixtures following proper removal methods. You may need an extra hand to pull out your bathroom sink if it’s too heavy. If your sink rests on a vanity, remove the bathroom sink first. Next, remove the water tank of your toilet, followed by the caulk around the base to lift it off. Place everything for disposal to the dumpster.
4. Tear out the tub and tiles.
Depending on your bathtub type, you’ll be needing pry bars, utility knife, screwdriver and drywall saw to take it out. Ask someone to help you carry your fibreglass, steel or composite bathtub out. But, for cast iron tubs, use a sledgehammer to break it up into pieces in the bathroom as these are very heavy.
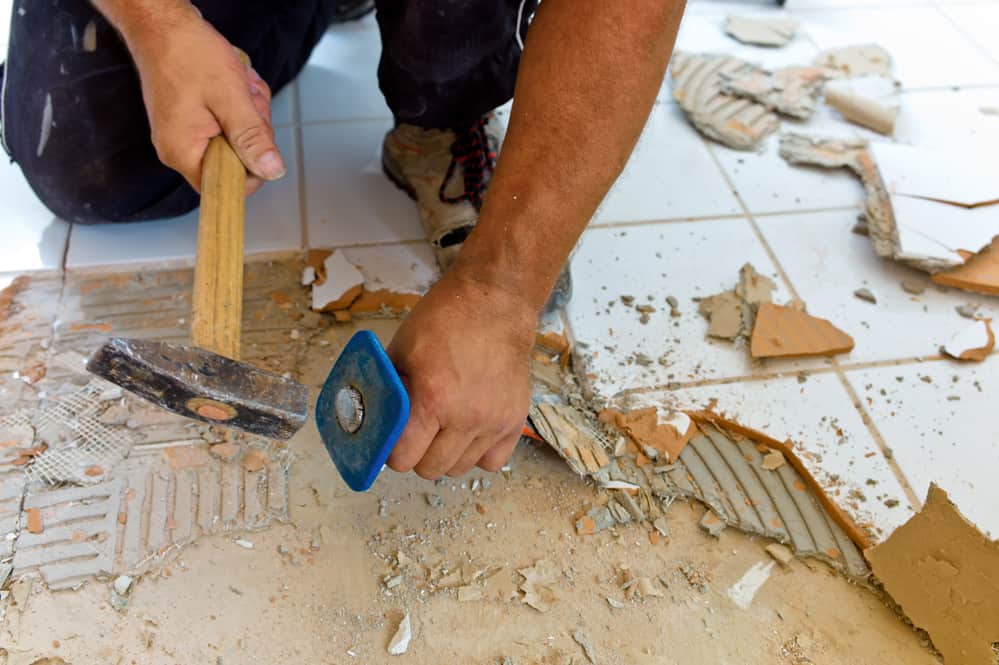
Tearing the bathroom tiles out is the most tedious of all. This task will take time but easy to do with a chisel and hammer. Make sure to take breaks and remove loose tiles and dust often to avoid accidents.
5. Install the new shower (or shower and tub), sink and toilet.
Time for the best part – installing all your new bathroom fixtures! Start with your shower, sink and toilet. As these will take the most space in your bathroom, make sure to pick a design that is stylish yet space-efficient. For example, toilets with hidden tanks are best for small bathrooms.
6. Hang new drywall and lay down new tiles.
Next, install your drywall. You need to cut it to size, and this may take a while. Once that’s done, putting it up should be a breeze. Make sure to cover the seams thoroughly. Also, consider using cement boards for your shower or bathtub area and apply waterproofing techniques to prevent leaks or damage. Then, decorate your walls with your choice of paint or wallpaper. Mould and mildew-resistant paints are best.
Use a mason’s chalk to draw reference lines that will keep your floor and shower tiles straight and even. Aside from colour and design, choose tiles made for safety. Also, install your bathroom tiles using grouts that are mould and stain-resistant.
7. Install the new vanity, cabinets and lights.
Finally, add the finishing touches that will give style to your remodelled bathroom. Then, turn on the power and water supply. Clean up your bathroom and fill your cabinets with supplies. Once done, take a step back to admire your handiwork. Time to enjoy a good, long shower!
Now that you’ve learned how to renovate a bathroom, how about improving your kitchen next? This article has a few great ideas to make it look expensive.
