Do you love gardening but can’t seem to keep your plants healthy and well? It must be because you keep on forgetting to water them regularly. Don’t fret. I believe black thumbs are non-existent, but wicking beds can most certainly help you. Read on this wicking bed gardening guide and learn how to build these self-watering plant boxes to make you (and your plants) happy.
What is a wicking bed?
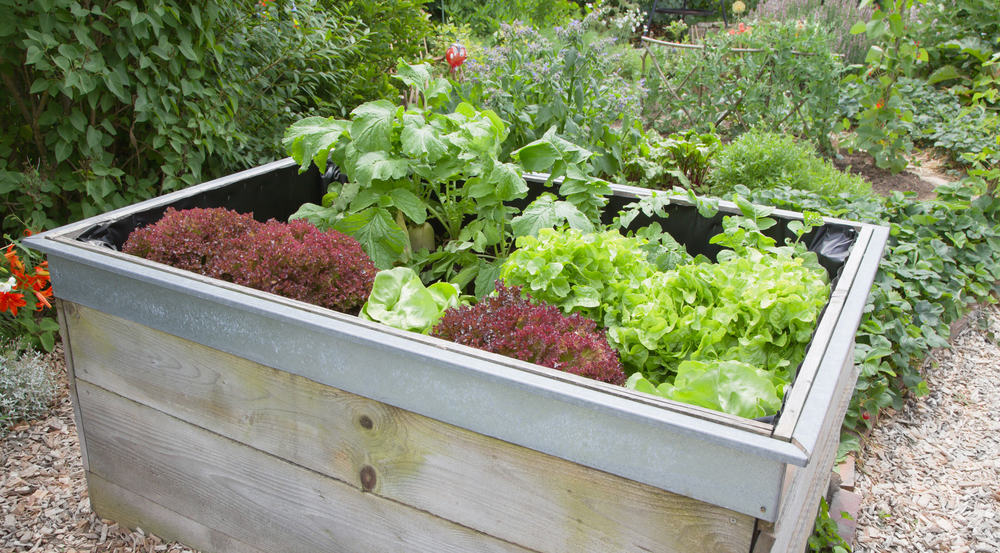
Wicking bed may look like your regular raised garden bed. What makes it unique is its watering mechanism, known as capillary action, that water plants from below. Try dipping the edge of a tissue paper in water, and watch how the water travels upwards. This technique is how a wicking bed works and keeps your soil moist.
What are the pros and cons of wicking beds?
Wicking beds have several advantages compared with typical raised garden beds. However, they are also not for everyone, because of individual gardening needs and preferences. Here are their pros and cons.
Pros
- Water-efficient. Wicking beds water your plants from the bottom up to avoid surface water evaporation. With this feature, you’ll be watering less often and using about 40 to 50% less water than regular garden beds.
- Semi self-watering. The soil stays moist longer, and plants can thrive for days or weeks without added water. So, you can go on a camping trip and not worry about your beloved garden.
- Weed-resistant. Weeds find it hard to grow on wicking beds’ dry surface.
- Space-saving. Wicking beds come in various sizes to fit in big or small gardening areas.
- Adaptable. Wicking bed gardening suits arid locations, hot weather and yards with trees that may compete with water and soil nutrients.
- Productive. Plants grow with optimum nutrients and less stress on wicking beds, giving you healthier produce to harvest.
Cons
- Challenging. Wicking beds need the right materials, measurements and installation know-how to work successfully.
- Time-consuming. Building DIY wicking garden beds is detailed work and may take time, especially if you lack the skill or expertise.
- Expensive. While wicking beds are more durable, they also require more materials and tools to build. On a rough estimate, you’ll be spending four to five times more on wicking beds than raised ones.
How do I build DIY wicking garden beds?
While there are gardening stores in Australia that sell wicking garden kits, building DIY wicking garden beds is also a fulfilling experience. And if it’s your first time to create wicking beds, you can always consult gardeners and experts for advice. To start building, make sure you have the right materials and do the necessary procedures.
Materials
Gardening stores offer several materials for wicking bed gardening. To give you an idea before purchasing, here’s a checklist of the essentials you’ll be needing:
- Housing or container. You can use a steel planter, brick bed, plastic tub or wooden crate or box. What you should look for are durability and size. Make sure that it can hold its shape and last for several years. Also, its height should be at least 60cm, where you’ll allocate 30cm for your water reservoir and the rest for your topsoil.
- Pond liner or builder’s plastic. You’ll use this to line your container and keep it waterproof.
- Scoria or pea gravel. Water will occupy this aggregate layer to allow wicking.
- Geotextile fabric. You can also use shade cloth if this is not available. This material will prevent the soil from getting to the scoria and clogging your reservoir.
- Water overflow outlet. This fitting will allow excess water to drain and prevent your soil from being too wet or saturated.
- Water inlet pipes. These pipes will allow you to add water to your wicking bed with ease. Make this part using a PVC pipe and an elbow, then connect them to an agricultural or PVC pipe that will be at the bottom of your reservoir (forming an L-shaped design). Make sure that the top end of your inlet pipe is covered to prevent insects from getting in.
- Garden soil. Make sure to use high-grade soil with a good amount of organic matter and the right pH to support plant growth.
- Assembly tools. You’ll be needing a spirit level, drill with hole cutters and right drill bits, clamps and scissors.
Step-by-step procedure
Once you’re ready with the materials, follow these steps to start building your wicking bed:
- Place your container at a location where there’s ample sunlight. Use the spirit level at different angles to ensure that your reservoir is level.
- Drill a hole at the side of your container, about 20cm above the ground.
- Cover the inside of your container with pond liner. Secure the top edges with clamps.
- Cut a hole on your pond liner to fit through the side hole, then put the water overflow outlet in place. Make sure that the washer is against the pond liner for a leakproof seal.
- Prepare your water inlet pipes. Drill 10 to 12mm holes around your bottom pipe, then connect it to the inlet pipe using the elbow pipe. Position your inlet pipe near your overflow outlet.
- Start filling your container with scoria, up to the level where you installed the overflow outlet. Test your reservoir for leaks.
- Cover the scoria layer with geotextile fabric or shade cloth.
- Fill your reservoir with soil then trim off the excess pond liner.
- Your wicking bed is now ready! Fill the reservoir with water until it spills out the overflow outlet, then start planting your choice of seedlings. Check out this article on organic vegetable gardening to learn more. Make sure to still water your plants from above for a week or so as the soil will take some time before it can wick on its own.
I know, it’s a lot of work, and you may encounter missteps here and there at first. But with experience, you will be able to master the art of wicking bed gardening and start harvesting one healthy crop after another!
