If you’ve been looking for ways to cut down your food expenses or reduce food waste, the answer may be right inside your grocery bag. Did you know that you can repurpose your lettuce base, tomato seeds or herb stems for growing food? Read on and find out how you can grow food from scraps that usually end up in your waste bin!
Things You Need to Grow Food from Scraps
Recycling food scraps is an excellent way to save money and reduce food waste. What’s even better is that learning how to grow food from scraps doesn’t require advanced gardening skills or a large vegetable garden to start. Anyone at home with a glass jar, shallow saucer, water and some potting soil can successfully grow fruits or vegetables from leftover stalks, seeds or leaves. Clear jars are best for growing roots, so you can easily see when your plant is ready for transplanting.
You do need to remember a few things to keep your fruit or vegetable scraps growing. For instance, make sure to change the water regularly to prevent slime or insects from breeding. Place your growing plants by the window to get some much-needed sunlight. Also, once you’ve transplanted them, keep the soil wet and gradually move your plants someplace with more sun.
How to Grow Food from Scraps
You can regrow vegetables from scraps through cuttings, rhizomes, seeds, bulbs or tops. Also, depending on your fruit or vegetable scrap, some may need more attention while others take only a few weeks to sprout. Here are some step-by-step examples, from easy to advanced, to help you get started.
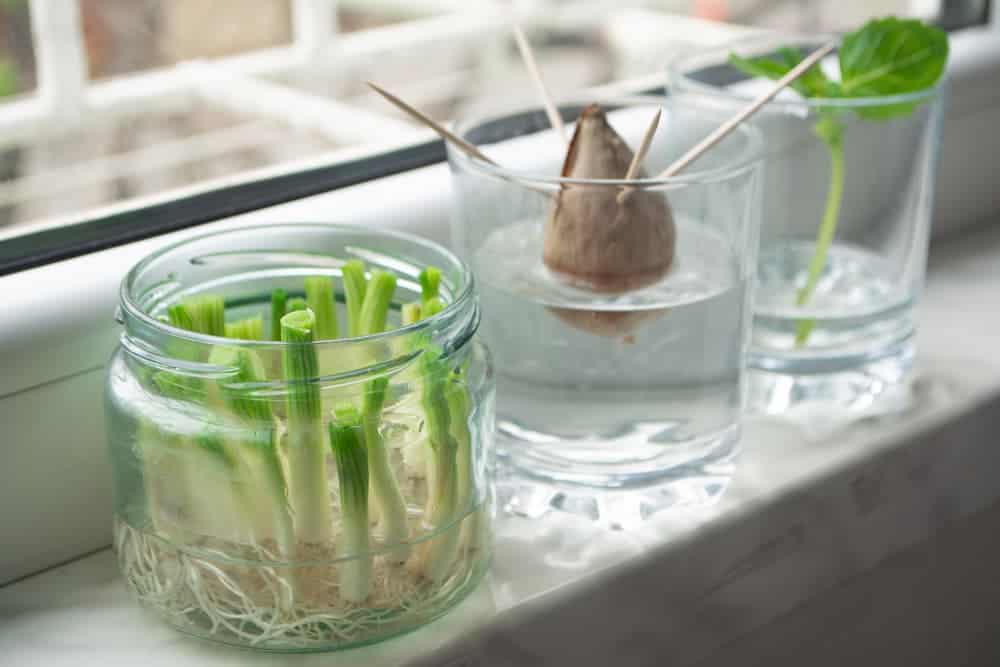
Green onions, leeks and scallions
- Save the root portion of your green onions, leeks or scallions.
- Submerge the roots in a water-filled jar, about one-fourth the size of the stalks.
- Place the glass jar on a sunny windowsill and change the water daily.
These allium vegetables are the easiest and fastest scraps to grow and should be ready for harvesting in about a week. Also, you can transplant them to soil or leave them in water to continue harvesting.
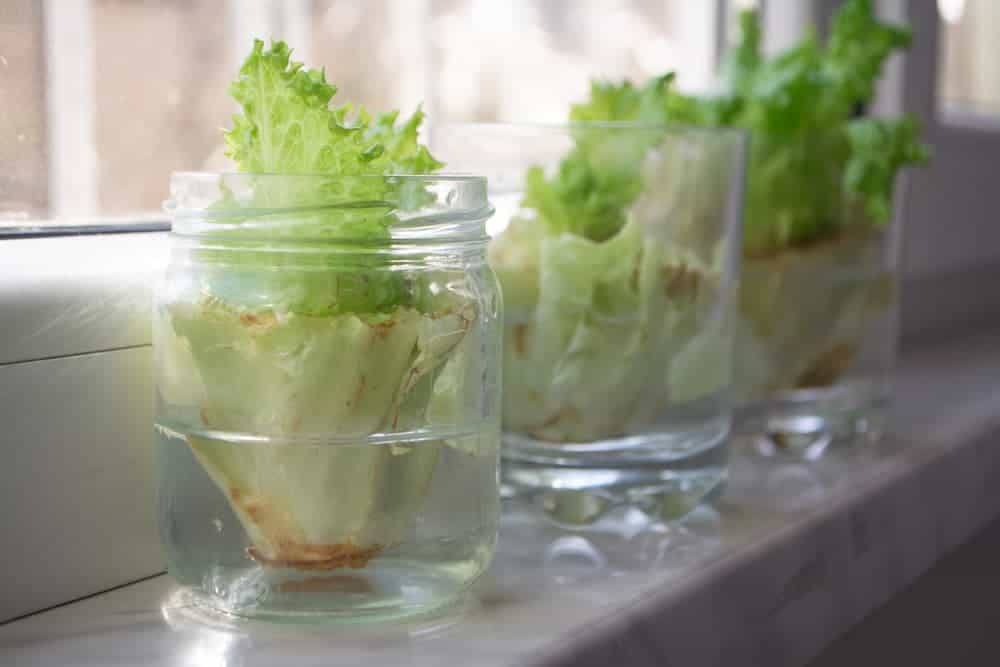
Cabbage, celery and lettuce
- Cut off the base of your cabbage, celery or lettuce, about 2.5cm thick.
- Put the vegetable base, cut side up, in a jar or shallow bowl with water, about 1cm high.
- Position your plant bowl in a sunny spot and refresh the water every few days.
- Keep the water level constant and mist the tops with water twice per week.
In 5 to 7 days, your vegetable scrap should now have roots and be ready for transplanting in a pot with soil or directly to your garden. When transplanting, cover the roots and base with soil but keep the top with regrowing sprouts exposed.
Lemongrass
- Cut about 4 to 5cm of the lemongrass from the bottom part.
- Peel off the outer layer of the stalks, then tie them together in a bundle.
- Place the lemongrass stalks inside a glass jar filled with about 1cm of water.
- Place your glass jar in a sunny area and refresh the water every few days.
Your lemongrass stalks should develop new roots in about 2 to 3 weeks. Transplant them in a large pot with soil then place them somewhere with lots of sunlight. Lemongrass grows well in warm weather, so make sure to move your plant indoors during winter. Your lemongrass is ready for your marinades, sauces and curry when it’s 30cm high. When harvesting, cut off the stalk close to the base. Do not uproot it, so the plant can continue to grow.
Basil, cilantro and mint
- Save a few 10cm stems of your store-bought herbs, removing most of their leaves.
- Place your herbs in a water-filled glass jar.
- Position the glass jar in a sunny spot and refresh the water every other day.
When the new roots are around 5cm long, transplant your herbs in pots with soil. Make sure the plants are watered regularly and get about 6 hours of sun daily. New shoots should appear in a few weeks, and your full-grown plant is ready for harvesting in a few months. Harvest leaves as needed for your salad and sauces, making sure that you do not remove all the leaves in one go.
Potatoes
- Cut old potatoes with sprouted eyes into pieces. Each piece should have one or two eyes.
- Let the potato sections dry out at room temperature overnight or for a few days.
- Plant one potato section in a pot with soil, about 10 to 15cm deep.
- You can also plant them directly to your garden. Make sure they are 30cm apart.
New potato plants will sprout in a few weeks and ready for harvesting in 10 weeks. It takes quite a while before you can harvest it, so make sure to plant them in spring.
Tomatoes
- Save the mushy insides of your tomatoes (after prepping your tomato sauce ingredients).
- Wash the seeds then let them dry thoroughly.
- Plant the seeds in a pot with soil. Keep the soil moist by watering a few times a week.
- Make sure to place your growing plants in a sunny area.
Tomato seedlings should be ready for transplanting in about two weeks, or if they are already 5 to 7cm high. Transfer the seedlings to a new pot, keep them in a sunny spot and water as needed. It will take about 65 to 85 days before your tomato plants are ready for harvesting.
Avocado
- If you have space for trees, then save your avocado pits.
- Clean each avocado pit in cold water then wipe it dry.
- Push toothpicks around the sides of the seed, creating a harness of some sort.
- Find a jar to securely hold the seed with half of it submerged in water.
- Place the avocado pit in the jar with its pointed side up.
- Position the jar in a sunny spot and replace the water every day.
It will take about 3 to 6 weeks before the pit splits open and several weeks more to sprout roots, leaves and stems. At times, avocado pits may not produce roots at all, so it’s best to grow several seeds at once. In about three months, your seed should now be a small 20cm tree with lots of roots ready for transplanting. Keep your avocado tree growing in a sunny spot and make sure to water it regularly. An avocado tree takes 12 to 18 months to grow before you can harvest its fruits. It will need lots of maintenance and patience, but it surely is more rewarding than letting the pit go to waste.
If you have scraps like fruit and vegetable peelings that you cannot regrow, you can still repurpose them by composting. Check out this article and learn how you can start making compost at home!
