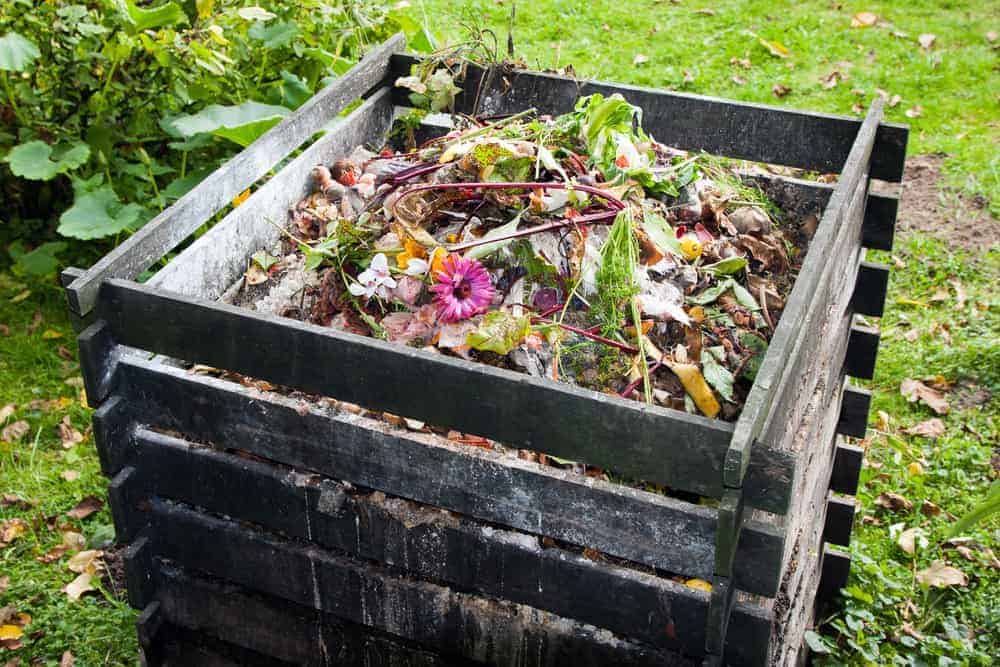
Eager gardeners like you are perhaps all too keen to start making compost at home. Sadly, some ended up with a discouragingly stinky, rotten mess. Homemade compost is like cooking: it needs the right ingredients, equipment and method. And once you get the basics down, you’ll have more than enough black gold for your garden in no time.
Why Is Making Compost at Home Beneficial?
Home composting starts with food scraps and garden waste piled up to create the ideal environment (temperature, nutrients, moisture and oxygen) for helpful microbes to grow. These microorganisms include helpful bacteria, fungi, moulds and yeast. Critters like worms, centipedes and pillbugs are also part of your compost gang. They’ll feed on the waste materials of the compost pile and excrete a soil-like by-product that contains the necessary nutrients your plants need. It’s truly a marvellous cycle that keeps on giving. But the benefits of making compost at home do not stop in your garden.
- Saves the soil. Our soil is currently depleted of helpful microorganisms for plant growing. Making compost at home and using it helps rebuild our soil and biodiversity.
- Saves water. Homemade compost contains moisture, which improves the water retention of your soil and lessens the need for you to water your plants.
- Saves money. Without the need for excessive watering or synthetic fertilisers, you’ll be gardening with less cost. Moreover, growing your food in a vegetable garden or wicking bed means fewer trips to the grocery store.
- Saves the atmosphere. Letting food waste decompose in the landfill releases a harmful greenhouse gas called methane, which leads to global warming. Home composting can then help reduce the release of this toxic gas in the atmosphere.
How Can You Start Making Compost at Home?
There are several types of composting to suit every gardener’s need and preference.
- Hot or aerobic composting. Decomposition of compost materials leads to heat generation. Your compost pile then needs to be turned and aerated by manual or mechanical means to protect the aerobic microbes. Aerating helps speed up decomposition and prevents unpleasant odours. It’s excellent for big gardens as it produces compost in large volume. However, this method may need more time and maintenance.
- Cold or anaerobic composting. This technique starts like hot composting but without the pile turning. Here, the goal is to let anaerobic organisms do the work. It’s effortless, but decomposition takes a long time. Moreover, it gives off a strong odour and releases harmful methane gas. The Bokashi composting technique solves this with the use of enclosed bins with spout for containing your compost materials. It’s perfect for smaller gardens. Also, Bokashi containers release “Bokashi tea” or liquid fertiliser for your plants.
- Vermicomposting. Here, red worms take centre stage. This composting type is the quickest and emits less odour, but you need to build a composter and purchase worms from the garden store.
To help you get started, here are the steps on how to make compost at home.
1. Choose your composting bin and location.
Depending on your preference, size of your garden and the amount of compost you want to make, you can go for an open pile or enclosed compost bin. Make sure to position it somewhere flat and sunny. It also needs to be accessible, so you can turn or layer it when necessary.
2. Layer your green and brown matter.
Keep in mind though that whichever technique you choose for making compost at home, the balance of green and brown matter in your pile is crucial. Greens are your kitchen waste, coffee grounds, soft green pruning and fresh lawn clippings. Browns are dried leaves, woody branches, shredded dry paper and straw. The recommended ratio for your compost pile is three parts of brown matter to one part of green material. Creating an alternating layer of these materials will prevent your compost from being too wet and stinky. Make sure to chop your materials in smaller pieces for faster decomposition. Check out this article for the list of things you can (and cannot) add to your compost bin.
3. Top up your bin with more kitchen or yard waste.
A small compost bin or pail in your kitchen comes in handy when collecting more food waste then adding them to your compost pile. In your garden, have a container for storing dried leaves and other garden waste. This way, there’s always a balance of green and brown matter in your pile every time you top it up.
4. Mist and stir your pile as needed.
The microorganisms in your compost pile need moisture to thrive, so mist it with enough water. It should feel like a damp sponge. If you chose to do hot composting, keep your compost pile aerated to achieve the ideal temperature. Check its centre every once a week, and if it feels warm (between 54C and 65C), use a garden fork to turn it.
5. Let the compost mature.
The time needed when making compost at home depends on several factors like your chosen composting technique, amount of waste and weather. Some are ready to use in a few months, while others may take a year or so. Just be patient and make sure to check on it regularly. When your pile is no longer warm and has already turned into a dark, crumbly soil with an earthy odour, pat yourself on the back. Your compost is now ready! You can mix this with your garden soil when planting new plants. It’s also perfect for top dressing and transplanting. You can even make compost tea out of it for watering your garden. And if you don’t have a garden, find a local community garden near you. They will be more than happy to receive your homemade compost. Happy composting!


