A hardwood floor adds value to any home. It’s long-lasting and makes any room look stunning. That is, until it gets in contact with its one true nemesis: moisture. Water accumulation then leads to the dreadful warped wood, where your once beautiful flooring now has bumps and grooves. It looks unappealing for sure, but buckling can be repaired and avoided. Here are the essentials you need to know about timber floor repair and care.
What is Hardwood Floor Buckling?
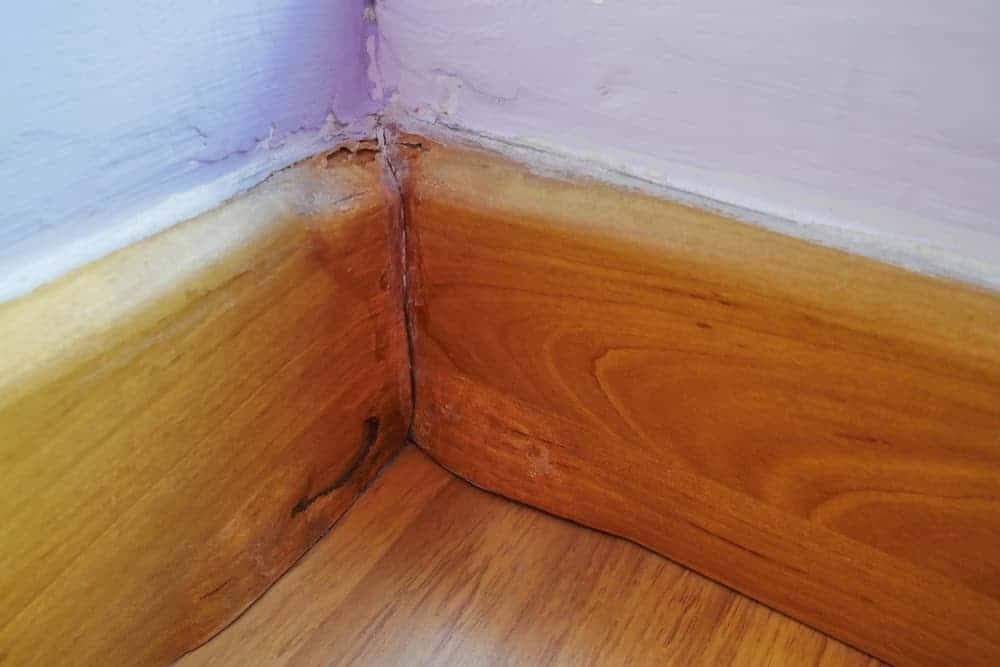
Before you get on your timber floor repair project, it’s best to understand the problem first. What exactly is buckling? Well, over time, wooden floorboards can contract or expand, depending on various factors. When this happens, you’ll see your flooring slowly lifting at the edges (cupping) or forming a hump at the centre (crowning).
Hardwood boards may also crack into separate layers. In some cases, buckling can be so bad that you can already see the subfloor underneath. Warping or buckling is unsightly, but more importantly, it can cause tripping or accidents. So, make sure to repair it as soon as you see its early signs.
What Causes Wood Floor Swelling?
Water damage is often the cause for your solid or laminated hardwood floors to swell or buckle. However, there are other factors to consider. Make sure to take note of these, so you can prevent this problem from happening or reoccurring:
- Excess moisture on the subfloor. If your crawl space or basement easily attracts or collects moisture, the excess can transfer to your wooden floors. This issue can also happen if you’ve installed a new HVAC system in a room with existing timber flooring.
- Changes in air humidity. Wood reacts with environmental or weather changes. If buckling is not severe but happens throughout your home, air humidity is your likely culprit.
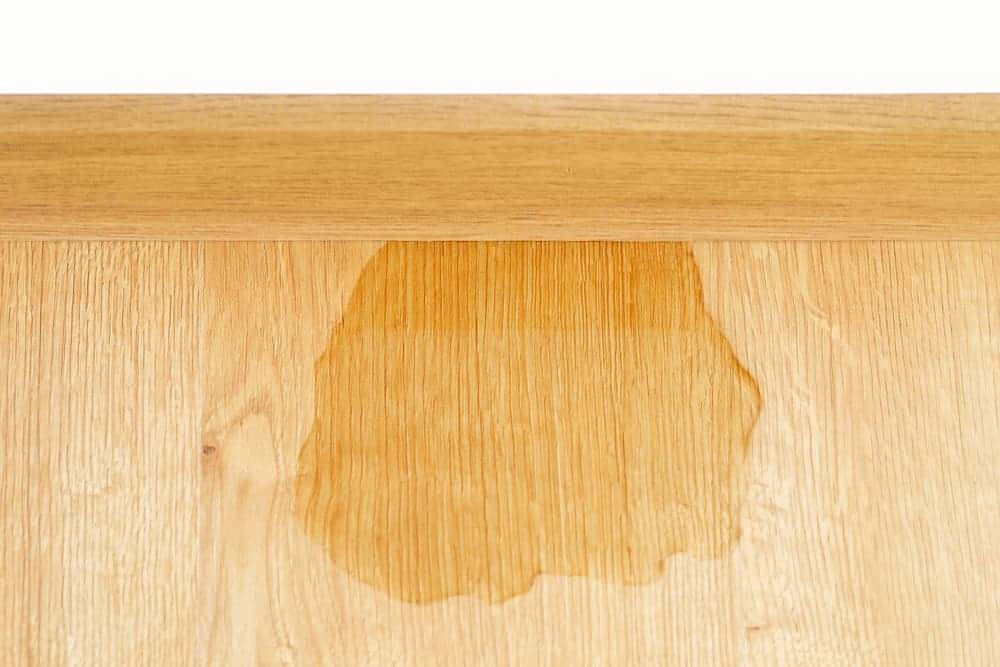
- Leaks or spills in confined areas. Do you have wood flooring near your sink or dishwasher? Over time, moderate leakage from these areas can cause gradual but significant warping.
- Improper floor wiping or cleaning. At times, some moisture can stay from leaks or spills, especially when you fail to clean them up immediately. Unsuitable cleaning agents or techniques can also worsen the damage.
- Flooring installation issues. Insufficient subfloor drying before installing your hardwood floor can lead to warping later on. Buckling can also be due to nailing problems and inadequate glue application during installation. Not using a moisture barrier or not allowing the floorboards to acclimate can cause problems, too.
How Do I Fix a Buckled Floor?
Buckling doesn’t always require timber floor repair. At times, all you need is to clean and soak up all the excess water with towels. Next, dry-vacuum the spot to remove any moisture left.
After which, use a disinfectant cleaner that suits your wooden floor, then have an electric fan speed up the drying process. You can also put a dehumidifier in the area for a day. If your flooring is still showing signs of buckling after a few days, then it’s time to fix it.
These steps should make the process easy!
1. Resolve the cause of floor damage
Try to figure out the origin of the excess moisture first. Make sure to fix it to prevent floor damage from happening again. If the cause is due to improper flooring installation, you might want to consider getting flooring expert advice and help.
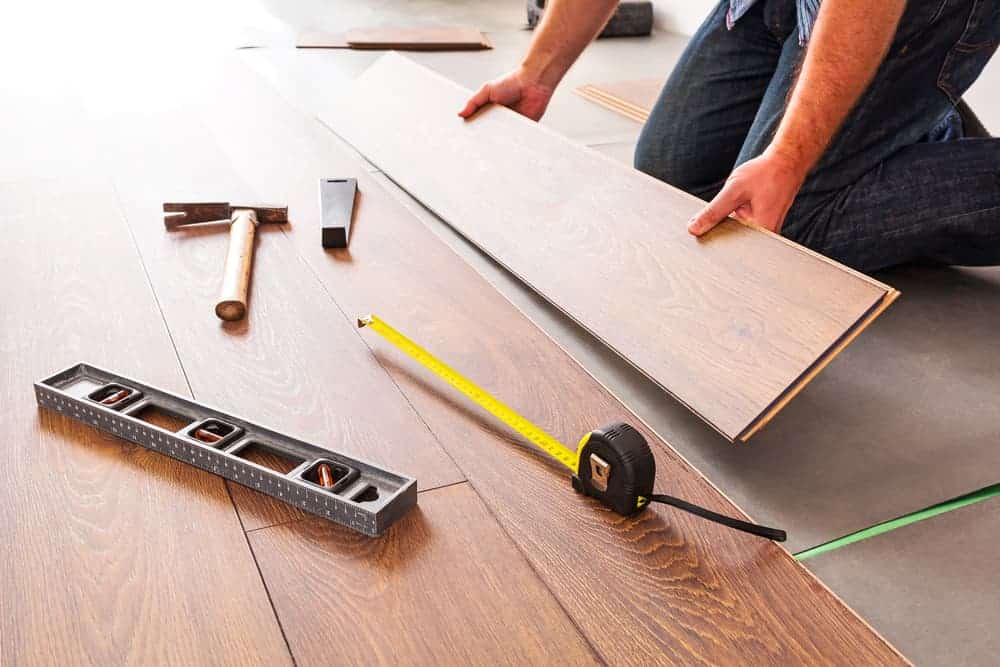
2. Remove the damaged wood
Start your timber floor repair by carefully removing the bowed wood. Depending on the floor installation and the extent of damage, you may need a chisel, screwdriver or prybar for this job. Use a hammer with your chisel, if needed, to tap and easily remove the warped planks.
If you’ve previously used adhesive to install your floorboards, make sure to scrape the old glue from the subfloor. Once clean, dry the spot thoroughly using towels and a vacuum cleaner. Continue your repair when the area is adequately dry.
3. Replace the floorboard
Here, you’ll now need to shop for replacement boards. If you have spare hardwood planks from the previous floor installation, then you can use those, too. But if you’re buying new ones, make sure their colour and finish are close to the original flooring. If you cannot find a match, you can purchase natural planks of the same wood type as your floor, which you can stain later.
Make the necessary measurements, then cut your planks to size. Fit the boards properly and nail them to the surface. Apply some wood putty on top, wiping off the excess to avoid sticky stains. If you’re using glue for installation, leave a heavyweight on top for an hour to ensure it dries evenly. Make sure the adhesive is completely dry before doing the final step.
4. Refinish the new floor
Cap your timber floor repair project by sanding the brand-new plank with fine-grit sandpaper. Sanding removes dust or dirt and gives the board a smooth texture. Next, refinish the plank to match the rest of the flooring. Once done, let the area dry before putting things back in place. Remember, improper drying may put your new boards at risk of warping.
5. Apply proper wood care habits
With your gorgeous flooring back, you must protect it from future water damage from now on. Here are some tips you can use:
- Identify floor areas prone to water damage. These include your laundry room, kitchen and sink areas. Make it a habit to keep them dry after use and check them for leaks.
- Wipe spills right away. Grab highly absorbent towels immediately, so liquids do not have time to seep through. Aside from warping, accumulated moisture on wood also lead to stains, mildew and moulds.
- Mop wood floors correctly and sparingly. Use suitable floor cleaners. When cleaning with a wet mop, make sure to dry your floor immediately and thoroughly. If necessary, you can also install a sump pump and dehumidifier at home. Humidity data loggers are also helpful for monitoring ambient moisture levels.
- Choose engineered wood planks if possible. These reinforced boards can resist humidity changes and leaks better than solid or laminated wood.
Need more home improvement ideas? How about replacing your old kitchen sink? Our guide has everything you need, from choosing the right sink type to proper installation!
